Seeding Your Cool Season Lawn - Resource Center
Kentucky Bluegrass, Perennial Rye, Turf Type Tall Fescue, and Fine Fescue
Find Your Perfect Cool Season Grass Seed
Seeding Support Products
Introduction

This free guide is for cool-season lawn folks: Kentucky Bluegrass, Perennial Rye, Turf Type Tall Fescue, and Fine Fescue grass types.
It is geared towards those of you who have an existing lawn and are seeding as a way to thicken it up and add some better-quality cultivars that will help improve the overall look and performance of the lawn.
Many of you may be coming out of summer with some damage in the sunniest spots of the lawn - these areas have done you a favor by revealing their weakness.
Now you can reseed with some better quality, updated, and tested seed blends that may perform better in heat and direct sun, or under disease pressure.
I’m not really into the “burn the whole thing down with chems and start over” type strategies, although I do recognize they are needed in some cases.
The strategies that I have been teaching DIYers for the past decade online look something like this:
- Spring - Apply fertilizer to the lawn to encourage thick growth, apply pre-emergent to prevent Crabgrass, and mow regularly.
- Summer - Focus on irrigation and keeping the lawn from going dormant, switch to low Nitrogen, high Potassium ferts, and liquid bio-stimulant supplements.
- Fall (Option 1) - If your lawn is still thin at this point, aerate and overseed, blast it with Starter Fertilizer to thicken up the existing grass while the new grass grows in on the backside.
- Fall (Option 2) - If your lawn is already looking fairly thick,apply a pre-emergent for fall weeds andPoa annua, and continue to feed it withFlagship Fert to thicken it up further; noseeding is needed.
There is no lawn burn-down needed forany of this. Instead, we encourage theexisting grass to become thicker andhealthier, and then, in the fall, add grassseed to fill in the thin spots. You can startany time of year, but the VERY BEST time to start is the fall.
So, if you're reading this guide in the fall (or late summer), you’re in good shape. I can promise that by following the strategies I share in this free guide, your lawn will be thick and green by the time Halloween arrives. No kidding.

Why Fall is the Prime Time for Seeding and Feeding
Let’s talk about why fall is really the window of opportunity for any cool-season lawn owner aiming to level-up.
When autumn rolls around, you’ve got the perfect combo: soil that’s still nice and warm from summer, paired with cooler air temps. This means grass seed germinates fast, and the young grass gets a head start with less stress from heat, foot traffic, or those relentless summer weeds.
But it’s not just about tossing some seed and calling it a day. Fall is also when you want to feed your lawn. A couple of well-timed fertilizer applications—once at the beginning of fall and again a few weeks later—can do wonders:
- Boosting root growth so your grass digs in deep, ready to handle winter’s chill.
- Repairing any rough patches leftover from sun, drought, or backyard soccer matches.
- Setting you up for a thicker, more resilient, and vibrant lawn when spring makes its comeback.
In short: seeding and feeding in the fall doesn’t just “patch up” your yard; it’s your best shot at a lush lawn that will make you and your neighbors look forward to spring—no “scorched earth” required.
Overseeding vs. Burndown Renovation
Thinking About Starting Over Completely?
Let’s address the big question head-on—have you been tempted to scorch the earth and start fresh with a brand-new lawn? Not just a light overseed or aeration, but a full-blown renovation? If so, you’re definitely not alone.
We’ve all been there—reading about the latest and greatest Kentucky Bluegrass cultivars or the darkest, lushest Fescue varieties. It’s easy to dream about having a lawn that’s 100% uniform, vibrant, and pristine. No remnants of the old mixed in—just pure turf perfection.
But here’s the reality: going the full renovation route comes with more risk and complexity. You’re not just reseeding—you’re dealing with kill sprays, precise timing, and the potential for dormant weed seeds to spring to life once the soil is exposed. It’s a lot to manage, especially for most DIYers.
That’s not to say it can’t be done successfully—because it absolutely can! It’s just that, in our experience, most people get better results (and enjoy the process more) by building on the lawn they already have. With the right approach, you can dramatically improve your lawn’s appearance without having to start from scratch.
When a Full Lawn Renovation Makes SenseWhile starting from scratch isn’t usually necessary, there are a few specific situations where a full renovation is the smarter option:
- Severe Weed or Problem Grass Infestation - If more than 70% of your lawn consists of weeds or undesirable grass types, it’s likely better to start over. But if you’ve got at least 30% healthy, desirable turf, you can usually rebuild and thicken that existing base.
- Major Grading Issues - If your lawn is extremely uneven, lumpy, or riddled with drainage problems, a complete regrade may be needed. In this case, scraping everything off and starting fresh after regrading is the best route forward.
- Changing Grass Types (Cool-Season vs. Warm-Season) - This scenario often applies in the Transition Zone. If you’re switching from Fescue to Zoysia, or vice versa, a full renovation ensures a clean slate to support the new turf type.
How to Seed a Brand New Lawn in the Fall
So, let’s say you do decide to go the “nuke and pave” route—completely starting over with a bare patch of earth. Good news: Fall still sets you up for success! Here’s how to tackle seeding a brand new lawn and give those new blades the best shot possible:
When a Full Lawn Renovation Makes SenseWhile starting from scratch isn’t usually necessary, there are a few specific situations where a full renovation is the smarter option:
- Clear the Slate - Start by removing every bit of debris, lingering weeds, rocks, and dead grass. If you’ve used a kill spray or stripped away the old turf, make sure the area is clean and level. If the soil feels compacted, renting a core aerator or tiller will help loosen things up. Aim to cultivate the top 2 inches or so for best rooting.
- Prepare the Seedbed - Rake the topsoil smooth and break up large clods, but avoid overworking it into dust. This helps with drainage and ensures a firm, stable surface for seed-to-soil contact. If you’re dealing with heavy clay or super sandy soil, mixing in a bit of compost or peat moss can pay dividends down the road.
- Spread Your Seed - Pick the right type of grass seed for your region (cool-season blends like Kentucky bluegrass, ryegrass, or fescue for the North; Bermuda or Zoysia if you’re down South). Evenly broadcast the seed at the rate recommended for new lawns—don’t be shy, this is the time to get thick coverage. Using a broadcast or drop spreader helps avoid patchy spots.
- Lightly Cover and Tamp - Gently rake the surface so that most seeds are just beneath the soil line—no deeper than 1/4 inch. If you’ve got a roller handy, give the area a light pass to ensure good seed-to-soil contact (but don’t compact the surface).
- Water Wisely - Moisture is crucial at this stage. Water gently but thoroughly to keep the soil consistently moist (not soggy!) as the seeds germinate. A daily misting with a sprinkler works well until seedlings reach about 2 inches tall. After that, gradually back off watering to encourage roots to dive deeper.
A Little Patience Goes a Long Way
Within a few weeks—especially with fall’s cool nights and warm days—you’ll see little green shoots popping up. Stick to a regular watering schedule and keep off the grass while it’s young. Hold off on the first mow until your new turf is at least 3 inches tall.
By following these steps, you’ll set the stage for a lush, vigorous lawn to enjoy next spring. And remember: patience pays off. Fall’s conditions do most of the heavy lifting for you!
Spring Seeding vs.
Fall Seeding
When Is the Best Time to Seed Your Lawn?

If you’re aiming to thicken up your lawn with new seed, your absolute best window is late summer to early fall—specifically when soil temperatures drop to around 70°F.
To pinpoint the perfect timing in your area, download my free lawn care app for Android or iPhone. It tracks real-time soil temps and uses historical data to help predict when conditions are just right.
Why Fall is Ideal for Seeding
It may seem counterintuitive, but fall is perfect for growing new grass—because winter is just around the corner.
Here’s the deal: One of the biggest obstacles to establishing new grass is competition—mainly from weeds and other opportunistic grasses that thrive under the same water and fertilizer you’re giving your seed. These fast-growers can choke out your new turf before it even has a chance.
But when you seed in the fall, many of those competitors are naturally wiped out by the coming cold. Meanwhile, your new grass enters dormancy and waits patiently for spring—ready to bounce back stronger than ever.
Why Spring Seeding Comes with Risks
When you seed in the spring, you’re setting your new grass up to face a full season of competition. All summer and into fall, weeds and undesirable grasses have the opportunity to sneak in, take hold, and even outpace your desirable turfgrass.
One of the biggest threats during spring seeding? Crabgrass.
Crabgrass thrives in the same warm, well-watered conditions you provide for your grass seed. It’s aggressive, fast-growing, and can quickly outcompete new grass, leaving your lawn patchy—or worse, smothered.
If you’re not already familiar with crabgrass prevention strategies, such as using pre-emergent herbicides, I recommend checking out our free video guide for a solid overview.
Want even more detail? Download our free Pre-Emergent PDF Guide—it’s a great companion to this seeding guide.
Important Note for Warm-Season Lawns
If you have Bermuda, Zoysia, or Bahia and found yourself reading this cool-season guide—hang tight. Seeding warm-season grasses follows a very different playbook.
The best time to seed warm-season turf is late spring to early summer. These grasses take longer to germinate and establish, and they need lots of sunlight to grow properly. Fall’s shorter days won’t give them enough time to take hold, which can result in failed growth.
Pro Tip: Seeding warm-season grasses isn’t generally recommended. Instead, consider planting plugs in August or early September to fill thin areas.
While the plugs may not spread much over the winter, they will survive—and with just enough time before dormancy, you might even spot fresh rhizomes or stolons starting to branch out.
Seeding Time by Soil Temperature
When it comes to timing lawn care tasks, soil temperature is the most reliable benchmark. We follow it to stay aligned—literally on the same page—across regions, zones, and climates.
Soil temps dictate when to:
- Apply pre-emergents in spring
- Start fertilizing for new growth
- Begin seeding in the fall
For cool-season lawns, 70°F soil temperature is the magic number that signals the perfect time to seed. That’s when conditions are just right—not too hot, not too cold—and your new grass has the best shot at germinating, rooting, and thriving.
Soil temperature should be measured about 3–4 inches deep in the soil profile—not just the surface.
Want to know when your lawn hits 70°F? - Download the Yard Mastery App for real-time soil temps by zip code, plus lawn journaling and personalized recommendations.
Why 70°F Matters So Much
Think of new grass like a baby—it needs a low-stress environment to grow strong. If it germinates during extreme heat or faces a cold snap too soon, it might not survive long enough to establish.
That’s why 70°F soil temps offer the best balance:
- Not too hot to stress or scorch new seedlings
- Not too cold to stall growth or risk frost damage
- Provides a solid 45–60 day window for healthy establishment before winter
What Happens If You Seed Too Early or Too Late?
Too Early (Mid-Summer):
- Seed might sprout during a cool week
- But if temps jump to 90°F for a few days, your young grass can burn out fast
- Shallow roots won’t be able to handle the stress
Too Late (Mid-to-Late October):
- You risk a hard frost or freeze before the grass is mature
- New seedlings won’t have time to build strong roots or “harden off”
- You may lose much of what germinated

Bottom Line:
Let soil temperature, not just the calendar, guide your seeding decisions. Your lawn will thank you come spring—with faster green-up, better density, and fewer headaches.
Fall Seeding Window
Understanding the Fall Seeding Window: How Long Will This Take?
Fall seeding isn’t an instant fix—it takes time, patience, and planning to give your grass the best shot at survival through winter. That’s why I talk about the concept of a “seeding window.”
This window varies depending on where you live, but the idea is the same everywhere: allow enough time for your new grass to germinate, grow, and be mowed at least twice before the first freeze.
What Is Germination?
Germination is the process of a seed coming out of dormancy and starting to grow. Grass seed is naturally dormant inside the bag. Once it’s sown and receives consistent moisture, the process begins:
- Roots form and begin pulling nutrients and water from the soil
- Shoots (blades) reach for sunlight to perform photosynthesis
- Sugars created from sunlight are sent back down into the plant’s roots to build strength
Germination Times by Grass Type
- Perennial Ryegrass: 4–5 days
- Turf-Type Tall Fescue: 8–10 days
- Kentucky Bluegrass (KBG): 18–21 days
A common mistake with KBG is stopping watering too soon—be patient. Just because you don’t see sprouts right away doesn’t mean nothing is happening.
What Happens After Germination?
- New seedlings may become visible within 1–2 days of germination, depending on depth and conditions.
- It will take approximately 3 weeks before your new grass is ready for its first mow.
- After another 7–10 days, you’ll be mowing again.
When Is the Grass “Hardened Off”?
Generally, once your new grass has:
- Germinated
- Been mowed twice
…it is tough enough to handle the onset of winter.
This means your minimum seeding window should be at least 45 days before your expected first frost.For best results—and more margin for error—give yourself 60 days if possible.
📲 Use the Yard Mastery app to check your soil temps and plan accordingly. You can even log photos and track your progress like a baby book for your lawn!
How to Grow Grass from Seed
Growing grass from seed may seem simple, but success depends on getting a few key conditions just right. Whether you’re patching a small spot or seeding an entire lawn, here are the three must-haves for healthy germination and establishment:
Proper Soil Temperature
We’ve already covered this, but it’s worth repeating:
Soil temperature needs to be around 70°F for optimal germination in cool-season grasses. Too hot or too cold, and your seeds may stall or fail.
Consistent Moisture
This is the #1 reason new grass fails to establish. Your seed needs constant moisture to:
- Trigger germination
- Sustain growth during the critical first few weeks
No water = no lawn.
Keep the seedbed consistently damp—3x per day watering is common early on.
3. Seed-to-Soil Contact
This factor isn’t as crucial on Day 1, but it quickly becomes vital. Seeds need contact with the soil so roots can:
- Anchor properly
- Access water and nutrients
Grass seed doesn’t need to be buried—but it must sit on top of loose soil, not stuck on thatch, mulch, or hard surfaces.
Want proof? Try this:
Place some grass seed in a coffee mug with water and keep it moist. It’ll sprout beautifully—then die after a couple weeks without soil to root into.
Or consider this true story from my TruGreen days:
Aeration crews often found seed sprouting in the plastic bed liners of their trucks after a few rainy days. The seed had everything it needed except soil—and sure enough, those little “truck-bed lawns” didn’t last long.
Preparing Soil for Seeding a New Lawn
So you’re ready to lay down some seed—but don’t skip the all-important soil prep. Here’s how to give your new grass the best possible head start:
- Loosen the Top Layer - Take a sturdy garden rake (or even just your hands and some elbow grease) and fluff up the top couple inches of soil. The goal isn’t deep tilling—just enough to break up compacted dirt and create a soft seedbed.
- Clear Out Debris - Remove any lingering clumps of dead grass, leaves, sticks, or rocks. Think of it like clearing clutter before moving furniture—the cleaner the canvas, the better your results.
- Establish Seed-to-Soil Contact - Once you’ve spread your seed evenly (using whatever spreader, scoop, or even an old coffee can works for you), use the back of your rake to gently work the seed so it’s nestled against the loose soil. You’re not burying it—just helping the seeds snuggle in for optimal rooting.
- Water Thoroughly and Consistently - Mist the area to keep the entire surface damp (not soggy) while your grass begins its journey. Daily watering—sometimes two to three times a day—is crucial until those new shoots hit about 2 inches tall.
With this easy groundwork, your future lawn has everything it needs to thrive.
Bottom Line:
Your seed needs all three to thrive:
🌡️ The right temp
💧 Steady moisture
🌱 A pathway into the soil
With those in place, you’re on your way to a greener, thicker lawn.
New Grass Seed Coverings
Do You Need to Cover Grass Seed?
Yes—especially in bare or thin areas where you can clearly see exposed soil before seeding or aerating. These areas are vulnerable to:
- Washout during heavy fall rains
- Drying out due to lack of moisture retention
- Birds picking off exposed seed
That’s why I always recommend using a seed covering in spots larger than a basketball. Covering your seed helps hold it in place, preserves moisture, and minimizes seed loss.
Best Seed Covering Options

1. Scotts Patchmaster (My Favorite)
Patchmaster is made of ground-up paper fibers—think of it like shredded mattress stuffing. It contains a small amount of seed, which means:
- Excellent moisture retention
- Easy to apply and stays put
- ⚠️ Contains seed, so not ideal if you want to keep your seed mix 100% pure
Pro Tip: Overseed the area first with your preferred seed, then apply a thin layer of Patchmaster. A little goes a long way—don’t pile it on.
2. Greenview Seed Starting Mulch
This option works similarly but comes in capsule form. When the pellets get wet, they expand and create a protective layer over the seed.
- Does not contain additional seed—great for maintaining purity
- ⚠️ Easy to over-apply; thick layers can choke your seed and stop germination
Pro Tip: Keep capsules spaced out about an inch apart for best results.
3. Peat Moss (Budget-Friendly Option)

Peat moss is a fantastic, low-cost choice. You can pick up large bricks at most home improvement stores for around $20.
- Excellent for moisture retention
- Won’t interfere with your seed mix
- ⚠️ It’s very light—prone to washing away in heavy rain
Pro Tip: Always water it in well right after applying to help it settle and stay put.
🚫 What to Avoid: Topsoil or Garden Soil

Don’t use topsoil or garden soil as a seed covering. Whether it’s bagged, bulk, screened, or labeled “clean,” you never truly know what’s in it.
- ❌ May contain weed seeds or foreign plant matter
- ❌ Can introduce disease or unwanted grasses
- ❌ Often compacts and blocks germination
Real Talk: I’ve seen weird stuff grow out of bagged topsoil—trust me, it’s not worth the risk.
New Grass Seeding Support - What to Use and Why
Even with the perfect timing, top-tier seed, and great weather, your lawn still needs a solid support system to maximize success. That’s where the Yard Mastery Seeding Support Packs come in—designed to give your seed the best environment to grow and thrive.
Why Use Lawn Fertilizer in Fall?
Think of fall fertilizer as the insurance policy for your lawn’s year-round good looks. Applying fertilizer in autumn provides several key benefits:
- Encourages robust root development—essential for withstanding winter and bouncing back strong in the spring.
- Helps your grass recover from summertime stresses like heat, drought, and energetic little feet (or paws).
- Boosts overall turf health by replenishing depleted nutrients, making your lawn thicker, healthier, and more resilient.
- Improves color and density, so you’ll greet spring with greener, lusher grass instead of patchy, tired turf.
If you want to set your lawn up for a blockbuster comeback when the snow finally melts, a fall feeding or two is the secret to success.
Granular + Liquid Seeding Support Pack

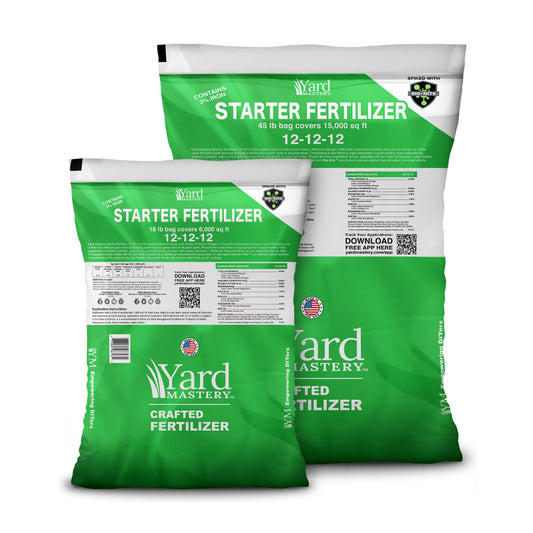
- 1x 18 lb bag 12-12-12 Starter Fertilizer (granular)
- 2 quarts Compaction Cure (bio-stimulant for soil health)
- 1x 8 oz bottle Mesotrione (pre-emergent safe for seeding)
- 1x Hose-end sprayer
- + Bonus Magnet!
Granular + Liquid Seeding Support Pack
- 1x 18 lb bag 12-12-12 Starter Fertilizer (granular)
- 2 quarts Compaction Cure (bio-stimulant for soil health)
- 1x 8 oz bottle Mesotrione (pre-emergent safe for seeding)
- 1x Hose-end sprayer
- + Bonus Magnet!

Starter Fertilizer
- High in Phosphorus, which builds deep, strong roots
- Nitrogen promotes lush top growth
- Potassium protects against stress from heat or cold
- Includes Iron & Zinc for overall turf health
- Fortified with Bio-Nite, a natural additive that feeds beneficial soil microbes
➡ Application rate: 3 lbs / 1,000 sq ft

Compaction Cure
- Breaks up tight soil with Potassium Hydroxide
- Improves penetration of water and nutrients
- Boosted with Humic, Fulvic, Sea Kelp, and more
➡ Application rate: 6 oz / 1,000 sq ft

Moisture Max
- A humectant that holds water in the soil
- Prevents evaporation and keeps seeds moist longer
➡ Application rate: 6 oz / 1,000 sq ft

Mesotrione (aka Tenacity)
- Pre-emergent weed control that’s safe for new seeding
- Prevents weeds from competing with your grass seed
- Can also be used post-emergent on broadleaf weeds
➡ Application rate: 1 tsp / 1,000 sq ft
Note: Always apply with a battery or pump sprayer (not hose-end)
Can You Mix These Products Together?
Yes! If you’re using a 4-gallon battery-powered sprayer, you can mix:
- Mesotrione
- Compaction Cure
- Moisture Max
Use the included white floodjet tip for even coverage.
Here is a YouTube Video on mixing liquid fertlizers.
Fall Fertilizing Tips for Best Results
- Time your fall fertilizer application for early autumn, then repeat it 6–8 weeks later.
- Choose a product suited to your grass type—opt for a balanced blend if you're targeting root strength and overall recovery after the summer.
For lawns with warm-season grasses like St. Augustine, centipede, or zoysia—and if you're fending off pesky weeds or fire ants—look for formulas that combine feeding, weed control, and pest prevention.
When applying:
- Use a spreader (either broadcast or drop, depending on your preference).
- Wait for a calm day with little to no breeze to keep the fertilizer where you want it.
- Carefully read and follow the instructions on your fertilizer bag for optimal coverage and safety.
And don’t worry about walking across the lawn as you spread—it can help press granules gently into the soil, just like when you’re seeding.
Why Fertilize in Early and Late Fall?
Fertilizing your lawn in both early and late fall is your not-so-secret weapon for building a thick, resilient yard that’s ready to take on next season’s challenges. Early fall feedings help your grass bounce back from the summer beatdown—think heat, drought, and backyard parties galore. This jumpstarts root growth and encourages strong blades, setting the foundation for a lusher look.
Here's what to know:
- Early fall fertilizer: Repairs tired turf after summer stressors and promotes new root growth.
- 6-8 weeks later: A second application continues to strengthen roots, storing up nutrients for a “wake up and grow” head start when spring rolls around.
- The result: You get a thicker, richer lawn come spring, with fewer bare spots and better resistance to future drought and foot traffic.
Ultimately, this two-step fall feeding approach is like sending your lawn off to winter with a warm jacket and a protein shake—it recovers better and bursts back greener when the snow melts.
Step-by-Step DIY Lawn Seeding Schedule
Step 1 – Mow Low
- Mulch the clippings
- Mow 1-2 notches lower than normal (but don't scalp)
- This helps the seed reach the soil and gives existing grass room to grow
Step 2 – Aerate (Optional)
- If you plan to mechanically aerate, go over the lawn 3–4 times in different directions
- More holes = better seed-to-soil contact
- Not aerating? That’s okay—90% of DIYers skip this step and still get great results
Step 3 – Apply the Grass Seed
- Follow the application rate on the seed bag
- Use a spreader for even coverage
- Feel free to throw a bit extra by hand in the barest spots
Just don’t pile it up—overdoing it can smother germination.
Step 4 – Apply Starter Fertilizer
- Apply 3 lbs per 1,000 sq ft for granular options like 12-12-12 with Bio-Nite
- If using liquid, follow the instructions provided in your seeding pack
Walking over the seed during this step is fine—it actually helps press seed into the soil!
Step 5A – Apply Liquids (Pump Sprayer Only)
- Mesotrione – 1 tsp/1,000 sq ft
- Moisture Max – 6 oz/1,000 sq ft
- Compaction Cure – 6 oz/1,000 sq ft
- Spray the mixture evenly over the lawn
Step 5B – Use Hose-End Sprayer for Non-Mesotrione Liquids
- Apply Moisture Max and Compaction Cure separately using the hose-end sprayer included in your pack
- Walk the lawn evenly as you spray
Step 6 – Add Seed Coverings
(For Bare Areas)
- Peat Moss
- Greenview Seed Starting Mulch
- Scotts Patchmaster (only if you don’t mind it has seed included)
- Cover only visible soil areas or bare spots to reduce washout and retain moisture
Step 7 – Water Immediately
- Soak the lawn deeply after applying everything
- Water until the soil is wet 1 inch deep (test with your finger)
When to Start Mowing and Fertilizing After Seeding
First Mow: 10–14 Days After Seeding (Depending on Conditions)
After seeding, the starter fertilizer you applied will help jumpstart growth—not just for the new seedlings, but for your existing grass too.
What to expect:
- Your current lawn will green up and grow fast
- Within 10–14 days, it may start looking wild and overgrown
That’s your cue—it’s mowing time.
How to Mow Safely without Hurting Your New Grass
- Set your mower to the highest setting
- Use mulch mode (don’t bag clippings)
- Avoid riding mowers or zero turns — use a 21” walk-behind mower to reduce impact
- Mow quick and light—just “get on and get off”
The goal is to keep it tidy without stressing new seedlings
Pro Tip: Don’t wait until the lawn is a jungle. If it’s starting to look rough, that’s your green light.
When to Fertilize After Seeding
30 Days After Seeding: Apply Flagship Fertilizer
Once your new grass has had a month to establish, it’s time to feed it again—this time with a Nitrogen-rich fertilizer like Flagship 24-0-6.
- Why Nitrogen? It drives top growth and helps both new and existing grass thicken up
- Apply every 30 days through the rest of the season until winter hits
The combination of thickening new seedlings + boosting existing turf is what turns your lawn into a dense carpet.
Double Down for a Truly Lush Lawn
For the best results—not just this fall, but next spring—don’t stop at a single application. The real secret to a jaw-dropping lawn is the one-two punch of a pair of fall feedings. After your initial Nitrogen-rich feeding, plan to repeat the process about 6 to 8 weeks later, before winter settles in. This second round helps build strong, deep roots, repairs summer damage, and ensures your turf wakes up thick and healthy when spring arrives.
- Early fall feeding: Jumpstarts recovery and root growth after summer stress.
- Second fall feeding (6–8 weeks later): Reinforces root development, boosts green-up, and sets your lawn up for a strong comeback next year.
Keep this rhythm going every fall, and you’ll notice your lawn not only looks better now, but it will also come roaring back even thicker and greener after winter.
When to Spray for Weeds
- You can spot spray weeds after your second mowing
- Avoid blanket sprays—they may act as growth regulators and harm new seedlings
- Read the label on any product carefully (always!)
Reminder: Most fall weeds die off in winter anyway. Don’t panic—just focus on feeding and thickening your turf.
If you’re dealing with persistent weeds or pests (like dollarweed or fire ants, especially in southern lawns), consider products formulated to both feed the lawn and control those troublemakers. Always use a spreader for even coverage, and choose a calm, wind-free day to avoid drift. And seriously—always follow those label directions.
By keeping up with targeted weed control and those crucial fall feedings, you’ll set yourself up for a thick, green carpet that shrugs off winter and wakes up ready to impress next season.
Conclusion: You’re Now a Seeding Pro!
You made it to the end—nice work! Hopefully, you’re walking away with not just knowledge, but the confidence to take action and start your fall seeding project with success.
Whether you’re filling in thin spots or reviving your lawn after a rough summer, this guide gives you the tools to do it right.
Want a Year-Round Lawn Plan?
Download the free Yard Mastery app to:
- Track real-time soil temperatures
- Get a custom step-by-step lawn plan based on your grass type, location, soil temperatures and more!
- Log photos and progress in your personal lawn journal
Need Support or Have Questions?
Join the private Lawn Care Nut Facebook Group where I hang out daily answering questions and helping lawn care enthusiasts like you.
Thanks for reading—and hey, if this guide helped you, share your results!Tag me on X (Twitter) @AllynPaul, and let’s celebrate your progress.
I’ll see YOU in the lawn!
- Choosing a selection results in a full page refresh.